
The frame goes up. The boarding goes on. And then the question most people don’t think about until this point: how exactly does the raw surface become a finished wall? Plastering and finishing a media wall involves several distinct stages, and the choices you make here determine how the wall looks in your room for years. For a fully boxed-in look, our bespoke ceilings and bulkheads service ties the plastered wall neatly into the ceiling. Here’s a clear guide to what happens and what you can decide.
Quick answer
- Most media walls are skimmed — a thin plaster skim coat over plasterboard gives a smooth, paintable surface that matches the feel of the rest of the room.
- Plastering needs drying time — typically 3–7 days before painting, depending on coat thickness, room temperature, and ventilation.
- Paint is the most common finish, but decorative panels, wallpaper, stone cladding, and concrete-effect finishes are all popular alternatives for the feature section.
- The TV section and alcoves can be finished differently from each other — you don’t have to treat the whole wall identically.
- Decoration is usually separate from the build itself — Media Wall Master completes the structural build; painting and decorating is typically for you to arrange unless agreed otherwise.
Stage 1: Boarding the frame
Before any plaster goes on, the stud frame needs to be clad in plasterboard. This is a structural stage of the build — the board type matters because it affects how the surface behaves once plastered and painted.
Standard tapered-edge plasterboard is most common for media wall faces. Moisture-resistant board is rarely needed in a typical living room but may be specified if the build is in a room that has any history of dampness or condensation. Fire-rated board is used where the build is close to a flue or where building regulations require it — this is assessed on a build-by-build basis.
Boards are fixed to the stud frame and the joints between boards are either taped and filled (jointing compound) or skimmed over to produce a smooth continuous surface. Any socket cutouts, cable access points, and fireplace openings are cut at this stage before the skim goes on.
On cable positioning: All wiring runs — sockets, TV aerial points, AV cables, lighting circuits — need to be in place before boarding is completed. There’s no easy way to add cables into a boarded and plastered wall without cutting into the surface. Confirm all cable requirements before the boarding stage.

Stage 2: Plastering or skimming
Once the boards are on, the surface is prepared for finishing. There are two main approaches:
Full coat plaster vs skim coat
A skim coat is a thin layer of finishing plaster (typically 2–3mm) applied over plasterboard. It’s the standard approach for media walls because the plasterboard already provides a flat, stable base — the skim just gives a smooth, painted-ready surface. Most media walls Media Wall Master builds in South Yorkshire are finished with a skim coat.
A full coat of plaster (also called a two-coat system) is used over brick, block, or any background that isn’t plasterboard. If your media wall is built against an existing brick wall, parts of that wall may need full plastering before or during the build. The skim layer goes on top of the backing coat once it has dried.
How long does plastering take to dry?
Fresh plaster needs to dry before it can be painted — applying paint too early traps moisture and causes paint failure, bubbling, or uneven absorption. As a general guide:
| Condition | Approx drying time |
|---|---|
| Warm room, good ventilation | 3–5 days for a skim coat |
| Cooler room, average ventilation | 5–7 days for a skim coat |
| Full backing coat + skim | 2–4 weeks total |
Fresh plaster changes colour as it dries — wet plaster is dark, dry plaster is a uniform light pink or off-white. The surface is ready for painting when the colour is even throughout and the plaster is no longer cool to the touch.
Watch out: Painting over plaster that isn’t fully dry is one of the most common finishing mistakes. It looks fine initially but leads to paint flaking, damp patches, or a patchy finish that shows under certain lighting. If in doubt, give it an extra day — the wall will be there for years.
Mist coat first
New plaster should always receive a mist coat before the topcoat goes on. A mist coat is emulsion paint diluted with water (roughly 70% paint, 30% water) — it seals the porous plaster surface so the topcoat applies evenly rather than being unevenly absorbed. Skipping the mist coat results in a patchy, uneven finish. It’s a simple step that makes a big difference to the final look.
Stage 3: Finish options for your media wall
Once plastered and mist-coated, the wall is ready for its final finish. This is where the aesthetic choices come in.
Painted finish
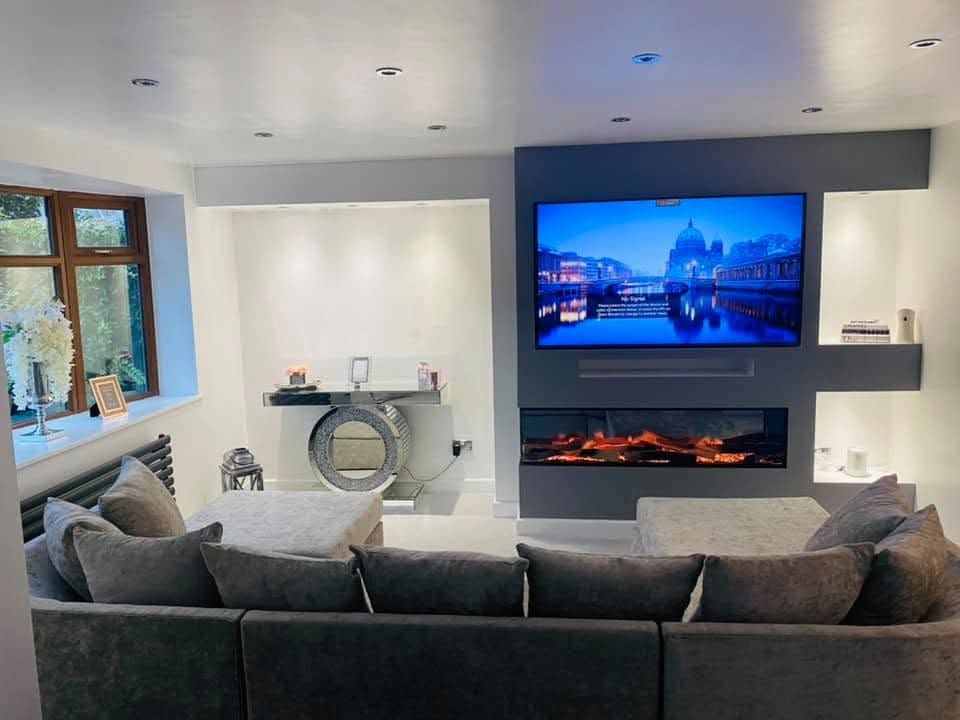
The most common choice and the most versatile. A painted media wall integrates into the room and can be refreshed or recoloured at any point without structural work. Most people match the media wall to the existing room colour scheme — either the same colour as the adjacent walls, or a feature colour that sets the wall apart.
Matt emulsion is generally preferred for media wall surfaces because it absorbs light rather than reflecting it, which makes the wall recede slightly and keeps the focus on the TV and any displayed objects. Silk or satin finishes are easier to clean but show brush marks and reflections more noticeably.
Wallpaper and panel effects
Wallpaper applied to the media wall — particularly to the section directly surrounding the TV — can add texture and visual interest without structural complexity. Panel effect wallpapers (that mimic wood panelling, wainscoting, or geometric patterns) are popular at the moment and work particularly well on the upper section above or flanking a fireplace bay.
Feature wallpaper on just the central TV section, with the alcove sections painted, is a common approach that creates a layered look without overwhelming the room. The plaster surface needs to be smooth and fully dry before any wallpaper goes on.
Stone, quartz, and decorative panels
For a more dramatic finish — particularly around a fireplace section — stone cladding, split-face tiles, porcelain panels, or decorative stone veneer sheets can be applied directly to the plastered surface or fixed to the structural frame. These add real visual weight and texture and are one of the most popular finishes for media walls that include an integrated fire.
Stone panels and cladding are typically fitted by a tiler or specialist fitter, and are usually sourced and arranged separately from the main media wall build. If you’re considering stone or tile around the fireplace section, the frame depth needs to be planned to accommodate the tile thickness and fixing method — worth raising at the quote stage.
Concrete-effect and specialist finishes
Microcement and concrete-effect plasters are a growing choice for media walls — they give a contemporary, architectural look and are applied as a finish coat over the existing plaster surface. They’re applied by specialist decorators and typically cost more than standard emulsion but give a finish that’s very difficult to replicate with paint alone.
These finishes need to go onto a properly prepared, fully dried plaster surface. If you’re considering microcement or similar, confirm the surface preparation requirements with your applicator before the build is completed.
Design note: You don’t have to finish the entire wall the same way. Many media walls combine painted upper sections with stone or panel cladding around the fire insert, and a different treatment in the alcoves. Mixing finishes is common and often looks better than a single finish across the whole wall.
Common finishing mistakes to avoid
- Painting too soon after plastering — traps moisture and causes paint to fail or look patchy. Wait until the plaster is fully dry throughout.
- Skipping the mist coat — fresh plaster is highly porous. Without a mist coat, topcoat paint is absorbed unevenly and the finish will look blotchy.
- Not protecting socket and cable openings during plastering — small plaster splashes inside socket boxes can be awkward to remove and interfere with electrical fittings.
- Applying heavy wallpaper or tile to a surface that hasn’t fully dried — the weight and adhesive can cause movement or cracking if the plaster hasn’t fully cured.
- Ignoring the ceiling and floor junction lines — the point where the media wall meets ceiling and floor is one of the most visible finishing details. Neat caulking, coving, or a clean cut line makes a significant difference to the finished look.
What Media Wall Master handles and what you arrange
Media Wall Master’s builds cover the structural work: frame construction, boarding, socket and cable first-fix, fireplace installation, and TV bracket fitting. Plastering is either included or arranged as part of the build depending on what’s agreed at quote stage.
Decoration — painting, wallpapering, tiling — is typically arranged by you after the build is complete and the plaster has dried, unless otherwise agreed. This is standard across most trades: the builder completes the build to a plastered finish, and you arrange decoration to your chosen spec.
If you want a specific finish — stone cladding, microcement, or complex tiling — it’s worth discussing this at the quote stage so the frame depth and surface preparation can account for it.
If you’re planning a new media wall and want to discuss the finish options at the same time, get in touch. It’s easier to account for finish details at the design stage than to retrofit them later. See what a full media wall build includes.
FAQs: Plastering and Finishing a Media Wall
Does a media wall have to be plastered, or are there alternatives?
Plastering (or at minimum jointing and skimming the plasterboard joints) is the standard approach because it gives a continuous, seamless surface. Alternatives include exposed board with scrim tape and decorator’s filler (a lower-cost finish), or decorative boarding systems that are designed to be left exposed and painted. For most domestic media walls, a skim plaster finish gives the cleanest result.
How long after plastering can I paint a media wall?
At least 3–5 days for a skim coat in a warm, well-ventilated room — longer in cooler or less ventilated conditions. The plaster needs to feel warm and dry to the touch, and the colour needs to have changed from dark to a uniform light shade throughout. Always apply a diluted mist coat first before the topcoat.
Can I tile directly onto a media wall?
Yes, tiles can be fixed to a plastered media wall surface. The surface needs to be fully cured and structurally stable. For heavy stone or large-format tiles around a fireplace section, the fixing method and frame depth need to be accounted for at the build stage — the frame may need to be deeper to accommodate the tile and adhesive thickness.
What’s the best paint for a media wall?
Matt emulsion is the most popular choice — it absorbs light rather than reflecting it, which suits a focal wall that you want to recede slightly. Satin and silk finishes are easier to wipe clean but show reflections more noticeably. Whatever finish you choose, start with a mist coat over new plaster before applying topcoat.
Can I add panelling or alcove features after the wall is built?
Yes — MDF panel mouldings, dado rails, and decorative effects can be applied to a painted media wall after the build. They’re glued and pinned to the surface. This is a common approach for homeowners who want to add features once they’ve lived with the plain plastered wall for a while and decided what they like.
Does the type of finish affect TV glare?
Yes, to a degree. High-gloss or silk paint finishes reflect more light than matt surfaces, which can contribute to screen reflections in some room setups. Matt finishes reduce this effect and also make the wall feel less dominant visually. For the section directly surrounding the TV, a matt or mid-sheen finish is generally preferable.
Ready to plan your media wall?
If you’re planning a new media wall in Sheffield, Doncaster, Barnsley, Rotherham, Leeds, Wakefield, Chesterfield, or anywhere across South Yorkshire, get in touch with Media Wall Master. We’ll give you a clear idea of what the build involves — including finish options — and a fixed quote based on your wall and your brief.
Send us a photo of your wall and your TV size (and whether you want a fire) and we’ll work from there.
Or call 07477 405111 / email dan@mediawallmaster.co.uk
See also: TV Media Walls | Integrated Fireplaces