
If you’re planning a media wall, you probably want to know exactly what to expect once you’ve booked. How long will it take? What will the team need to do? What does your home look like while work is underway? This guide walks you through a typical media wall installation from start to finish, so there are no surprises on the day.
Quick overview: what a media wall installation involves
- Site visit first: Most installers will measure up and discuss your options before any work begins.
- Framework goes in: Timber or metal stud frames form the structure of the wall.
- Wiring is routed: Socket positions, TV cable routes and any lighting are planned and run at this stage.
- Boarding and finishing: Plasterboard (or MDF panels) are fixed to the frame, then skimmed, painted or panelled.
- TV and fire fitted: The TV bracket is mounted, cables are hidden, and any integrated fireplace is installed.
- Completion and tidy-up: Final checks, snagging and a clean sweep before the team leaves.
Stage 1: Initial enquiry and site visit
Before any tools come out, a good media wall installation starts with a proper conversation. At Media Wall Master, we ask you to send a photo of your wall along with your TV size and whether you want a fire. That one message gives us enough to start talking numbers and options.
For more complex builds — particularly those involving a chimney breast, an existing alcove, or a built-in fireplace — we’ll arrange a site visit. This lets us check the wall construction, locate existing wiring and sockets, confirm clearances for any fire, and take accurate measurements.
What gets agreed at this stage
By the end of the enquiry and site visit stage, you should have a clear picture of:
- The footprint and height of the wall
- Whether any structural work is needed (e.g. removing or boxing around a chimney breast)
- Socket and switch positions
- The fireplace model, if you’re having one
- Any shelving, alcoves or built-in storage
- The finish: paint, panelling, or feature cladding
Stage 2: Preparing the room
Once the job is booked in, you’ll need to clear the wall and any furniture nearby. We’ll cover this in more detail in our preparation guide, but the key things to sort before installation day are:
- Remove anything mounted on the feature wall (pictures, shelves, existing TV)
- Clear a working area in front of the wall — usually 2–3 metres of floor space
- Confirm socket positions one final time
- Decide on your paint colour or finish so boarding can be timed correctly
Stage 3: Framework and stud work
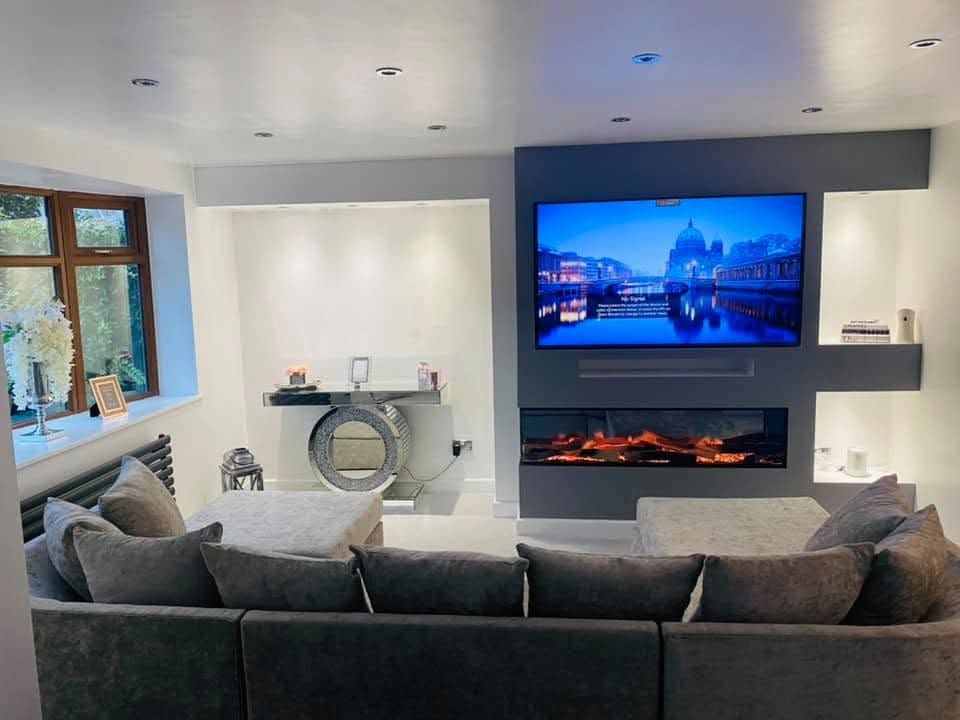
The first thing to go up on installation day is the frame. This is typically built from CLS timber or metal studwork, fixed back to the existing wall and floor. The frame gives the wall its shape and depth, and it’s also where all the wiring routes are planned.
Depth matters at this stage. A standard media wall is usually 100–150mm deep, which allows enough space to hide cables and a standard TV bracket. If you’re incorporating a larger electric fire or want a cavity for a soundbar, the depth is planned at this stage.
How long does the framework take?
For a straightforward media wall without a chimney breast, the frame can be up within a few hours on day one. More complex builds — those with structural elements, multiple alcoves or a return wall — may take a full day to frame out correctly.
Stage 4: First fix electrics
Once the frame is in place, an electrician runs the cables before any boarding goes on. This is called first fix. All the work that needs to be inside the wall — socket cables, TV coaxial cables, HDMI cable conduits, and lighting circuits — is done at this stage.
At Media Wall Master, we work closely with Yorkshire Fireplace Centre on almost every job, which means the fireplace wiring requirements are coordinated with the build from the start rather than being treated as an afterthought.
- Power sockets: Positioned inside the wall cavity, flush with the finished face
- TV cable route: Conduit or trunking runs from where the TV will sit down to AV equipment level
- HDMI and data cables: Run inside the wall if needed for consoles, streaming devices or speakers
- Lighting: Any recessed LED strips or spotlights are wired at this stage
Stage 5: Boarding and second fix
With the frame up and cables in, the wall gets boarded. For most media walls, this means plasterboard fixed to the stud frame, which then gets skimmed (plastered) for a smooth finish. Some builds use moisture-resistant board if there’s a wall-mounted electric fire generating heat.
The boarding stage is when the wall really starts to take shape. Apertures are cut for sockets, switches, TV bracket plates and any built-in fire opening. The fireplace recess — if you’re having one — is carefully lined and finished to meet the fire manufacturer’s specification.
Finishing options
Once boarded, the face of the wall can be finished in a number of ways:
- Skim plaster and paint: The most common finish. Clean, seamless, matches your existing walls.
- MDF panels or battens: Create a panelled or linear effect across the face of the wall.
- Feature cladding: Stone-effect panels, shiplap, or decorative PVC/timber cladding applied over the board.
- Tiling: Occasionally used behind integrated fireplaces as a heat-resistant surround.
Stage 6: TV mounting and AV setup
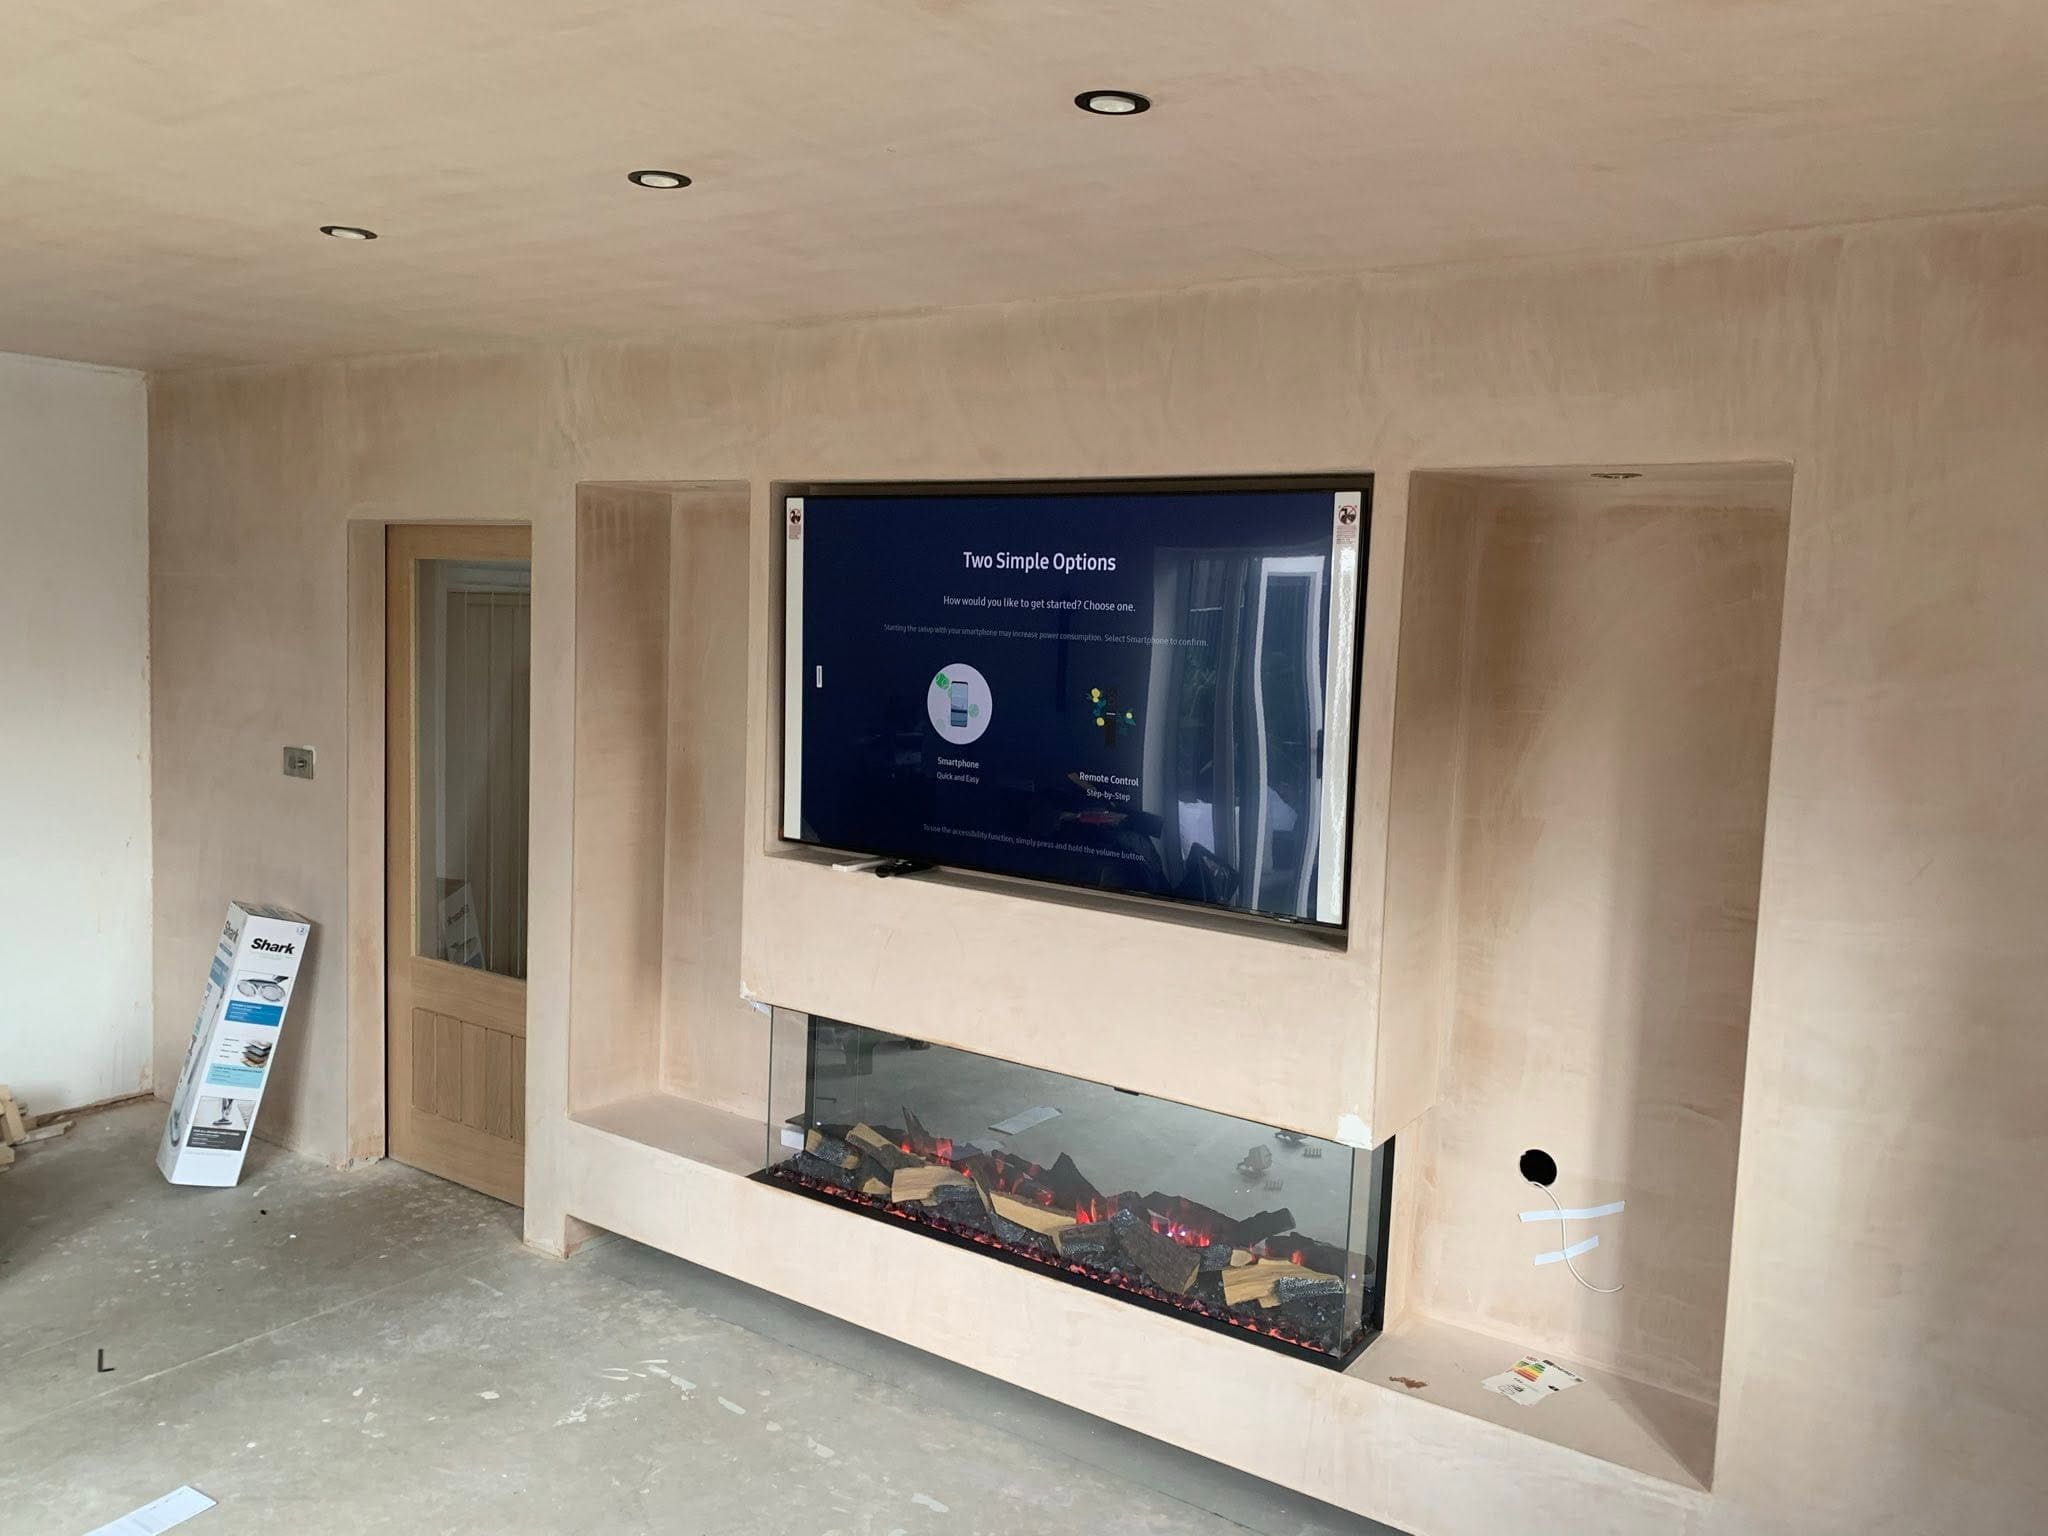
Once the wall is finished and decorated, the TV bracket is fixed to the wall through the board and into either the timber stud frame or a dedicated noggin. All cables are pulled through from inside the wall and connected.
This stage also includes connecting any AV equipment — games consoles, streaming sticks, soundbars — and routing their cables neatly out of sight through the wall cavity to the TV position.
Stage 7: Fireplace installation
If you’re having an integrated electric fire, it goes in at this stage. The fire unit slides into the recess built during boarding, connects to the electrical supply that was run during first fix, and gets secured and tested.
At Media Wall Master, we work with integrated fireplace specialists on almost every job that includes a fire. That coordination means the recess dimensions, heat clearances and cable routes are all built to match the specific fire model you’ve chosen — rather than adapting the build to fit a fire that wasn’t planned for from the start.
How long does a media wall installation take?
A straightforward media wall — frame, board, socket, TV bracket, painted finish — typically takes 2–4 days on site. Builds with an integrated fireplace, shelving, alcoves or decorative cladding will generally take longer.
Here’s a rough breakdown:
- Day 1: Frame, first fix electrics, boarding
- Day 2: Skim plaster (or panel finish), sockets and switches fitted
- Day 3 (your job): Plaster dries, you paint or arrange a decorator
- Day 4–5: TV bracket, fire installation, cable tidy and final checks
For larger or more complex builds, allow 4–5 days on site. We’ll give you a realistic timeframe at the quoting stage — most media wall builds complete within 3–5 days on site depending on size and finish.
FAQs
Do I need to be at home during the installation?
You don’t need to be present every hour, but someone should be available to answer questions — particularly on day one when final socket positions and routing decisions are made. We’ll confirm the key decision points ahead of the job.
Will there be much mess?
Any plastering, cutting or drilling creates dust. We protect your floors and furniture and tidy up each day, but a full clean after the build is complete is recommended. If we’re skimming, expect construction dust in the room for a couple of days.
Can I use my room while the media wall is being built?
During active build days, the room will have tools, materials and dust sheets in it. Most customers move the furniture back at the end of each day, but the room won’t be fully usable until the build is complete.
Does the electrician work at the same time as the builders?
First fix electrics happen during the framing stage, so the electrician usually attends on day one or two. Second fix (sockets, switches, lighting) happens after boarding. We coordinate this so you don’t need to manage it separately.
What happens if something needs adjusting after installation?
We snag the job before we leave. If anything isn’t right, it’s addressed before sign-off. For any issues that emerge later, contact us directly and we’ll get it sorted.
Do you handle the decorating too?
We leave the wall skimmed and ready to paint. Decorating is typically carried out by the homeowner or their decorator, as paint choices are personal and scheduling a decorator separately often works better. We’ll tell you exactly when the plaster is ready.
Ready to plan your media wall installation?
The best way to get an accurate idea of timescales and costs is to send us a photo of your wall along with your TV size and whether you want a fire. We’ll come back to you with a realistic quote and a clear plan.
Get a quote from Media Wall Master
Call 07477 405111 or email dan@mediawallmaster.co.uk